
Practical Garden Guide
Garden Hose Timer Not Working? A Troubleshooting Checklist
Isolate the power, supply, programming and valve one at a time before resetting or replacing the timer.
By Gardening Is Ezee EditorsUpdated 16 min read
A garden hose timer that is not working does not necessarily need replacing. Begin by identifying the symptom: no display, no water during a scheduled cycle, weak delivery, a leak, or water that will not stop. Each symptom points to a different set of checks. Changing batteries and resetting everything without a plan can erase useful information and leave the original problem unresolved.
Start with the water source and the exact model manual. Hose timers vary in battery requirements, operating pressure, valve design, reset procedure, and programming. Advice for one Orbit model, for example, should not be treated as a universal procedure for every timer or brand.
If water will not shut off, close the faucet first. If the unit is cracked, badly corroded, or has water inside its electronics, stop relying on automatic operation until the cause is resolved. You can hand-water while troubleshooting rather than allowing an unreliable timer to control the supply.
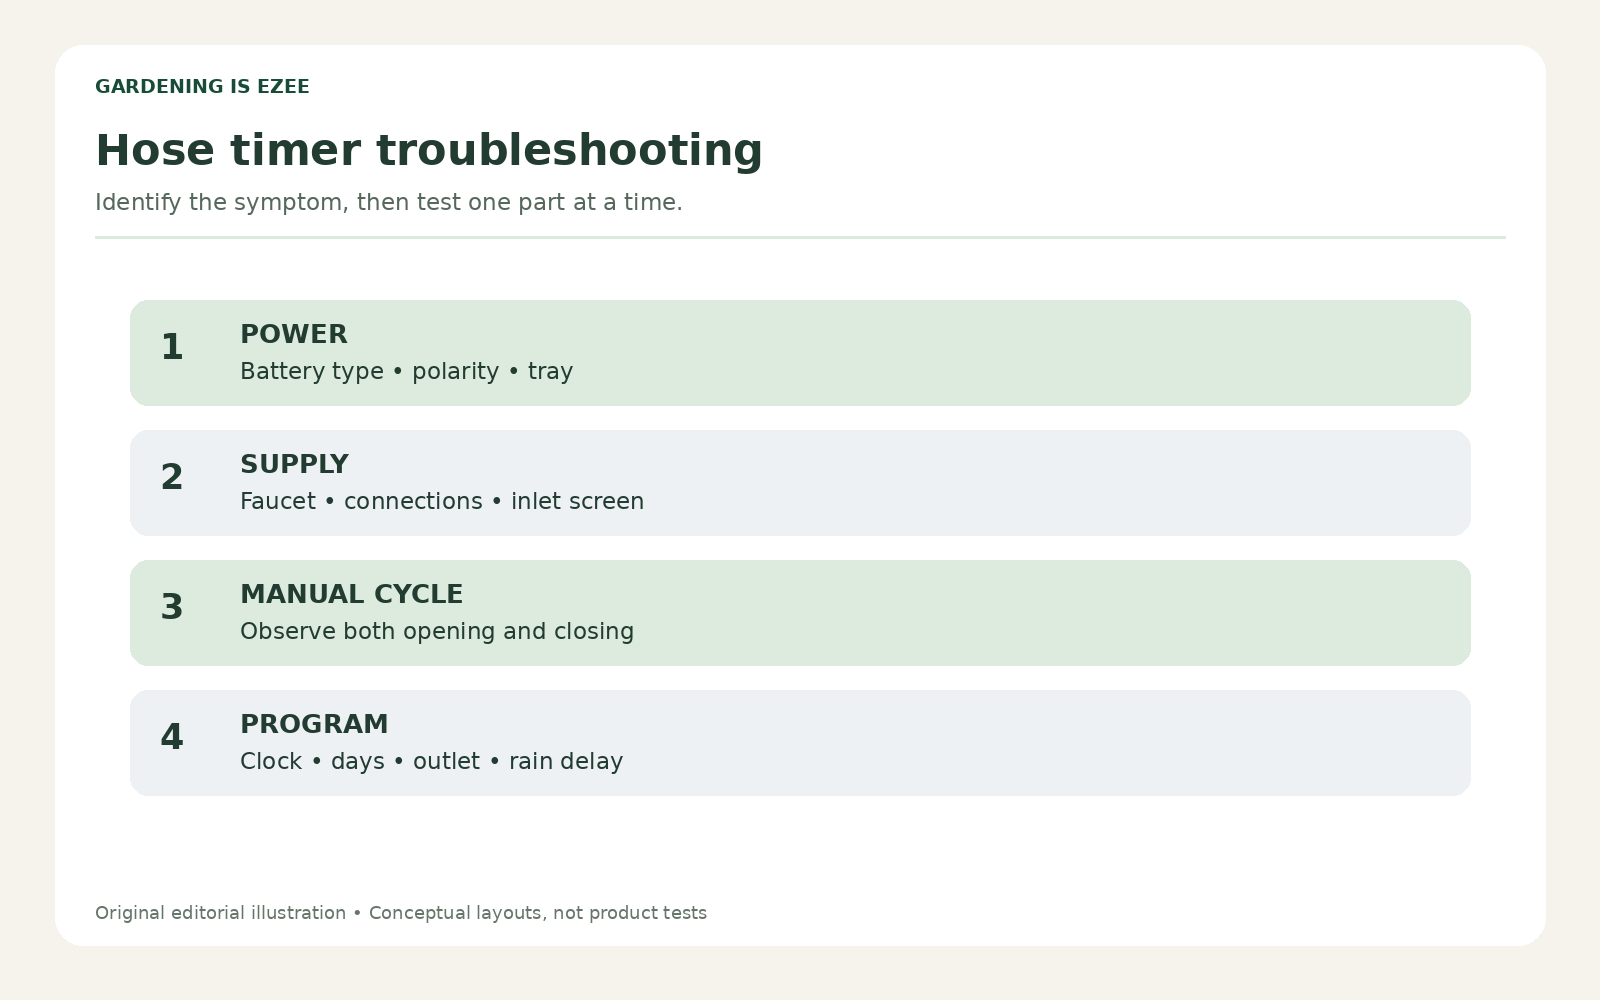
Illustration: Gardening Is Ezee. Follow the exact model manual before resetting or opening components.
Record the symptom before touching settings
Take a photograph of the display and write down what should have happened. Include the date, current time, scheduled start time, duration, selected days, outlet, and any delay symbol. If the timer controls several zones, note which zone failed. This short record prevents confusion after you change a setting.
Observe whether the problem is constant or intermittent. A timer that never powers up is different from one that misses a cycle once a week. An intermittent problem may be linked to programming, changing supply conditions, a weak connection, or a feature that pauses watering.
Do not begin with a factory reset unless the manual directs it. A reset may erase the schedule and make it harder to distinguish a programming problem from a hardware problem. First gather evidence, then choose the narrowest useful test.
The first four checks

A coiled garden hose and its fittings should be checked separately from the timer during diagnosis. Photo: Tomwsulcer, CC0 via Wikimedia Commons.

| Check | What to observe | What the result tells you |
|---|---|---|
| Faucet supply | Water flows without the timer | Whether the source is available |
| Timer power | Display, battery tray, contacts | Whether controls can operate |
| Manual cycle | Opens and closes as instructed | Whether basic valve operation works |
| Program review | Time, days, outlet, delay | Whether the expected cycle is actually scheduled |
Keep these checks separate. If manual watering succeeds but scheduled watering does not, focus on programming before dismantling the water path. If water is weak even without the timer, focus on the source and hose. A logical sequence saves both time and replacement costs.
No display: check batteries properly
Turn off the faucet before removing the battery tray or handling a wet unit. Use the battery type and quantity specified in the manual. Check polarity markings rather than assuming the arrangement. A battery inserted backward can prevent operation even when the other battery is correct.
Use a matched fresh set if the manufacturer calls for it. Mixing old and new batteries makes diagnosis less reliable. Rechargeable batteries are not automatically suitable; their voltage characteristics can differ from the battery type the timer expects. Follow the model guidance.
Inspect the tray seating and contacts. A tray that is not fully inserted may interrupt power. If contacts are corroded or the compartment contains water, consult the manufacturer about cleaning or service rather than scraping parts aggressively. Orbit's no-display troubleshooting page includes battery-tray and screen-washer checks for its timer guidance; use your model's instructions for the exact reset procedure.
A visible display does not prove the valve has enough power
The display and valve do different work. Seeing numbers on the screen is not a complete test of the battery condition or valve operation. Check for a low-battery indicator and use the manufacturer's recommended replacement procedure.
After replacing batteries, review the clock and program. Some timers retain settings; others may require re-entry or confirmation. Do not assume the displayed time remains correct. Check morning and evening indicators if the unit uses a twelve-hour clock.
Run a brief manual cycle and observe both opening and closing. Record whether the valve clicks, whether water begins, and whether water stops. A display that works while the valve does not needs a different diagnosis from a unit that has lost all power.
No water: test the supply without the timer
Close the faucet, relieve downstream pressure as appropriate, and remove the timer according to the instructions. Test the faucet with a controlled outlet or container so you can confirm flow without spraying the surrounding area. Keep water away from the timer's battery compartment.
If the source is weak or unavailable, check the faucet and any accessible upstream shutoff you normally use. Consider whether other equipment is drawing water at the same time. Do not adjust household pressure regulators or dismantle plumbing as a casual troubleshooting step.
If the source works normally, reconnect the timer carefully and test again. Make sure washers are seated, threads are aligned, and the inlet is connected to the correct side. Some installations include arrows or clearly labeled ports; use those markings instead of guessing from the shape of the unit.
Manual mode works, but the schedule does not
This result points toward a control or programming issue, although intermittent hardware faults remain possible. Review the current time first. An incorrect clock can make a perfectly valid start time occur at the wrong hour. Then check the active days or interval mode.
Look for a pause, rain delay, seasonal adjustment, or off position. A delay can remain active even when the screen appears normal at a glance. Check whether the timer is displaying the next scheduled event or a currently selected program; those can be different things.
On a multi-outlet unit, confirm that the schedule belongs to the intended outlet. A start time entered for outlet two will not necessarily operate outlet one. Write the schedule in plain language, such as bed one waters Monday and Thursday at six in the morning, and compare that sentence with the settings.
Use a short supervised program test
If the manual permits it, set a temporary cycle for a few minutes ahead and a short duration. Watch the unit start, run, and stop. Stay nearby and be ready to close the faucet. This test is easier to interpret than waiting until tomorrow and finding damp soil without knowing what happened.
After the test, restore the intended program and review it again. Temporary troubleshooting settings can become an accidental watering schedule if you forget them. Keep a photo of the final configuration so you have a record of what was actually saved.
For interval programs, read how the timer defines the starting day. Every two days might mean a countdown from setup, not a particular pair of weekdays. The wording on the display may be abbreviated, so use the manual rather than interpreting icons from memory.
Weak water delivery through the timer
Compare the same hose and attachment with and without the timer under similar source conditions. The comparison will not give a laboratory result, but it can show where to investigate. Keep the faucet opening and other simultaneous water use consistent where practical.
Inspect the inlet screen or filter if the manual makes it user-serviceable. Close the faucet and remove pressure before opening the connection. Clean it using the method the manufacturer specifies. A filter catches debris deliberately; removing it permanently may create new valve or emitter problems.
Check the installation's operating pressure and flow requirements. A gravity-fed barrel may not meet a timer's minimum pressure. A large irrigation network may exceed what the source can supply. Orbit has a low-pressure help page, but any pressure range must be confirmed for the exact model you own.
The downstream system may be the real problem
A clogged nozzle, folded hose, closed branch valve, or obstructed emitter can make the timer appear faulty. Test progressively: timer outlet, supply hose, then the final attachment. Change only one connection at a time so the result stays meaningful.
For drip systems, distinguish filtration from pressure regulation. A clogged filter restricts flow, while a regulator controls operating conditions. Components must be installed in the order and orientation specified for the system. An unsuitable regulator can create poor delivery even if the timer opens normally.
Read How to Set Up Drip Irrigation for Raised Beds if the problem began after adding beds or emitters. An expanded system may need separate zones. Making the cycle longer does not correct a branch that receives inadequate delivery.
Water does not stop: close the faucet first
If the timer remains open beyond the expected duration, shut off the source before troubleshooting. Do not leave the unit unattended while trying different settings. A stop command on the display does not prove water has stopped; observe the outlet or downstream flow.
Check whether a manual cycle is still active and whether the duration was entered correctly. On some interfaces, minutes, hours, and start times are easy to confuse. Compare the saved program with the manual's examples rather than relying on the number alone.
If the valve still fails to close in a controlled test, consult manufacturer guidance. Debris, damage, or particular flow conditions may be involved. Orbit's valve troubleshooting page describes model-related checks. Do not assume those steps authorize opening a sealed valve body or changing the product's pressure limits.
Leaks at the inlet or outlet
Find the exact leak location while using a brief supervised test. Water around the faucet connection suggests a different problem from water emerging through a crack in the timer housing. Dry the outside first if necessary so the path is visible.
Check the washer and mating surfaces with the water off. A folded washer, debris, cross-threading, or an unsupported hose pulling sideways can interfere with the seal. Tighten as instructed; overtightening a plastic coupling can damage it.
Do not treat tape as the universal repair. A washer-sealed garden-hose connection and a tapered pipe-thread connection are not the same joint. Identify the fitting before adding sealant. Replace a damaged washer with the correct size, and seek manufacturer advice if the housing or coupling is cracked.
Smart timer: separate connectivity from watering
A smart timer can have a working valve but an app connection problem, or a good app connection but a water-supply problem. Test local manual operation where the device permits it. Then inspect the app's status, connection requirements, and selected program separately.
Check whether the product uses Bluetooth, Wi-Fi through a hub, or another connection arrangement. A phone displaying an old status screen may not represent the current valve position. Review the last successful synchronization or event history if the app provides it.
Follow the manufacturer's reconnect procedure rather than repeatedly deleting and reinstalling the device. Re-pairing can remove schedules or require reconfiguration. Record settings first. If the timer relies on a hub, verify power and connection at that hub before changing the timer itself.
Weather features and rain delay
Rain delay usually pauses watering for a defined period or until you cancel it, depending on the timer. Smart weather adjustment can use forecasts or other information according to the product's design. Neither feature should be assumed to match actual soil moisture in every part of your garden.
Look for the reason a cycle was skipped in the app or display. If the device records events, use that history before changing the schedule. A skipped event caused by a delay is not the same as a valve that failed to open.
After the delay ends, confirm that the intended schedule resumes. If you manually water during the pause, consider that water when reviewing the next cycle. The goal is adequate soil moisture, not forcing the timer to run merely because a start time appears on the screen.
Cold weather and water intrusion
A timer damaged by freezing may leak, fail to move its valve, or behave unpredictably. Follow the model's seasonal removal and storage instructions before freezing conditions arrive. Leaving a timer outdoors because the faucet is off does not necessarily remove water trapped inside it.
Water intrusion into the battery compartment is a separate issue. Do not power-test a wet electronic unit until the manufacturer guidance says how to proceed. Orbit's non-responsive timer guidance discusses removal and drying in relevant cases; that is not a promise that a flooded device will recover.
Inspect seals and tray closures during routine maintenance. Make sure the compartment is properly closed after battery changes. A loose closure can turn a simple battery replacement into a new moisture problem.
A useful troubleshooting record
Use a simple log with columns for symptom, setup, test, result, and next action. For example: manual valve opens, faucet supply normal, downstream hose removed, no flow at outlet. That record narrows the investigation much more than a list of parts you have replaced.
Include model number, purchase date, battery type, operating arrangement, and photographs of the inlet and outlet connections. If contacting support, provide those details without sharing passwords or account access. Manufacturer support can give more precise advice when it knows the actual product and installation.
Stop changing parts once you have a clear warranty or service issue. Repeated disassembly can complicate a claim and may damage components that were originally sound. A temporary manual watering routine is often simpler while waiting for a documented repair decision.
Repair or replace?
A missing washer, incorrect schedule, weak batteries, or a cleanable screen usually calls for correction rather than immediate replacement. A cracked body, damaged coupling, persistent valve failure, or unreliable electronics may justify replacement or warranty service, depending on the product.
Before buying a replacement, identify why the previous timer failed. If the supply is outside the operating range or the device froze outdoors, another similar timer may fail the same way. If programming was confusing, a clearer interface may be more valuable than additional smart features.
Compare Orbit watering timers or rain-delay timers only after listing your requirements. Include outlet count, pressure range, manual control, schedule type, battery access, and compatibility with the irrigation system.
Frequently asked questions
Should I reset the timer immediately?
No. First record the symptom and settings, check power and supply, and follow the exact manual. Resetting can be useful when the manufacturer recommends it, but it may erase schedules. It does not repair a damaged valve, missing washer, or incompatible water source.
Can a timer work from a rain barrel?
Only if its specified operating conditions fit the barrel installation. Some valves need more pressure than a gravity-fed arrangement provides. Check both the timer and downstream system requirements. A low-pressure label needs a documented range, not an assumption based on the product name.
Why did the timer miss only one cycle?
Review delay settings, selected days, the clock, event history, and source conditions at that time. If the problem repeats, keep a log rather than changing several variables at once. An intermittent fault is easier to identify when you know which conditions were present.
Can I leave a failing timer connected?
Do not rely on it unattended. Close the faucet when it is not under supervision and use another watering method until you resolve the fault. A timer that sometimes fails to close can create a much larger problem than a missed cycle.
Isolate the fault with a controlled comparison
A good timer diagnosis keeps the setup as simple as possible. Start with the source alone, then the timer's basic operation, then the hose, then the final watering system. Keep a record of what changed between tests. Removing three components at once can show that the complete installation has a problem without showing which component caused it.
For example, suppose the timer opens but a sprinkler barely operates. If the same sprinkler performs normally through the same hose without the timer, investigate the timer and its inlet conditions. If performance is poor in both arrangements, investigate the source, hose, and sprinkler. That comparison narrows the next action without requiring you to dismantle the valve.
Use short supervised tests. Place a container or direct the outlet somewhere suitable so you can see the result. Avoid spraying water near the battery compartment, electrical equipment, or surfaces that become slippery. The test should create information while keeping the setup easy to shut off.
If testing a multi-outlet unit, label each branch and repeat the same check on one outlet at a time. A failed branch can be caused by its downstream arrangement even when the controller works. Conversely, a fault affecting every outlet may point toward a shared supply or power issue. The pattern matters.
Do not use an unapproved pressure adjustment as a diagnostic shortcut. Increasing household pressure or removing protective components may mask one symptom while creating damage elsewhere. If the required operating conditions cannot be established through ordinary checks, contact the manufacturer or an appropriate professional.
Prepare an effective support request
When you contact support, include the exact model number rather than only the brand. Add the symptom, whether manual watering opens and closes correctly, what batteries are installed, and what is connected downstream. A photograph of the installation often explains adapter order and unsupported loads better than a long description.
Include the result of your controlled comparisons. Source flows normally; timer display is working; manual operation opens but does not close; faucet was shut off immediately. This kind of concise evidence helps support identify the relevant procedure. A message saying the timer is broken gives them much less to work with.
Mention recent changes. Did the problem start after adding drip branches, replacing batteries, moving the unit, freezing weather, or changing the schedule? A new installation condition can be more important than the timer's age. Do not hide an inconvenient detail just because it might affect warranty coverage; accurate information is needed for a safe and useful answer.
Ask whether the proposed procedure applies to your model and whether it is user-serviceable. If a support article shows a different interface or valve design, request clarification before following it. The presence of the same brand logo does not establish that the instructions fit.
Keep the support response with the manual and your settings photograph. If the timer recovers, perform a complete supervised cycle before trusting it again. Confirm that it starts at the intended time, supplies the connected system adequately, and stops fully. A display returning to normal is only one part of the recovery.
Finally, review the installation that caused the failure if the cause is known. Store the unit before freezing, relieve unsupported weight, improve the water connection, or simplify programming as appropriate. A repaired or replacement timer should return to a setup that addresses the original problem rather than repeat the same conditions.
Use a temporary watering plan while the fault is unresolved
Write down which beds or containers need attention and how you will water them while the timer is out of service. A simple manual routine prevents the troubleshooting process from becoming a missed-watering problem. Check the plants and soil rather than reproducing the failed schedule automatically.
If another person helps, identify the faucet, the appropriate attachment, and the shutoff step. Explain that the timer is not being relied on. A visible note can prevent someone from reconnecting it because the display appears normal after a battery change.
Keep the temporary setup easy to inspect and store. Do not create a new unattended arrangement simply to avoid hand-watering for a few days. The aim is a manageable bridge while you obtain a diagnosis, repair, or suitable replacement.
When the original system returns to service, remove any temporary schedule or hose arrangement that could conflict with it. Review the final timer program and run a supervised complete cycle. Then check the garden after the next scheduled event so you can confirm ordinary operation, not only a manual test.
Sources and further reading
- Orbit: No-display troubleshooting.
- Orbit: Leaking and valve issues.
- Orbit: Non-responsive timer guidance.
- Orbit: Low water pressure after attaching a timer.
Editorial method: The checklist is an original diagnostic sequence supported by linked manufacturer guidance. Procedures and specifications vary by model. This article does not report product testing or replace the exact product manual.